Showing posts with label FMQ. Show all posts

Sunday, August 11, 2013

Finished: Coral Herringbone Quilt

It's so nice to have a finish to share! Come to think of it, this custom quilt has been in the works since the end of last year. It's going off to a share adventures with a sweet little girl in Texas. This was the first time I worked with someone long distance to complete a custom quilt. It was a great learning process, and it allowed me to take the new knowledge and make other custom projects go even more smoothly.


Custom quilts are tricky. The ideal situation is for you to make quilts and have folks buy from that inventory. (Hear that folks? Etsy shop.) If someone wants a custom quilt to go with the colors of a particular nursery, tell them how much fabric is needed and let them go buy it. You can point them to online and local resources if there are some quilt shops in their area or loan out your color cards on a deposit. It's important to make sure they know the difference between quilt shop quality fabrics and big box store or home dec material. This approach saves you from spending lots of time trying to find the right colors, when the client already knows exactly what they are looking for. The other benefit is that you only have to quote the cost of labor.


My baby quilts are usually in the neighborhood of 60"x40" before washing. Depending on how they are pieced and quilted, I usually see shrinkage in the neighborhood of 3-5%. I haven't ever measured 6% shrinkage, but I've heard from others that it's totally possible. If someone wants a quilt of a certain size, let them know that you can hit it within 5" in either direction, but that the nature of fabric, quilting, and laundering makes it nearly impossible to have specific dimensions when that quilt comes out of the dryer. It should be pretty easy to hit the mark within 2"-3" in either direction of the desired measurements. Do let your client know that design elements near the edges of a quilt may be cropped differently depending on how the squaring process goes.


I loved all the feedback about laundering quilts before you send them off. I'm definitely pro-washing so that they can go through the washing machine with a color catcher and through the dryer on high heat for good shrinkage. I always want to be able to check for color bleed, any threads that need trimming, and any necessary repairs before sending off the quilt. There were also great suggestions for sending along some extra color catchers with washing instructions for those first few times through the washing machine.

Quilty Stats:
Pre-wash dimensions: 62 1/8"x 41 5/8"
Post-wash dimensions: 59 3/8"x 39 3/4"
Batting: Warm & White from The Warm Company
Front Fabrics: Kona White, assorted prints including three Razmatazz Hipster prints
Back Fabric: Modern Meadow Herringbone in Pond by Joel Dewberry
Binding: Centennial Solids Silver Lining
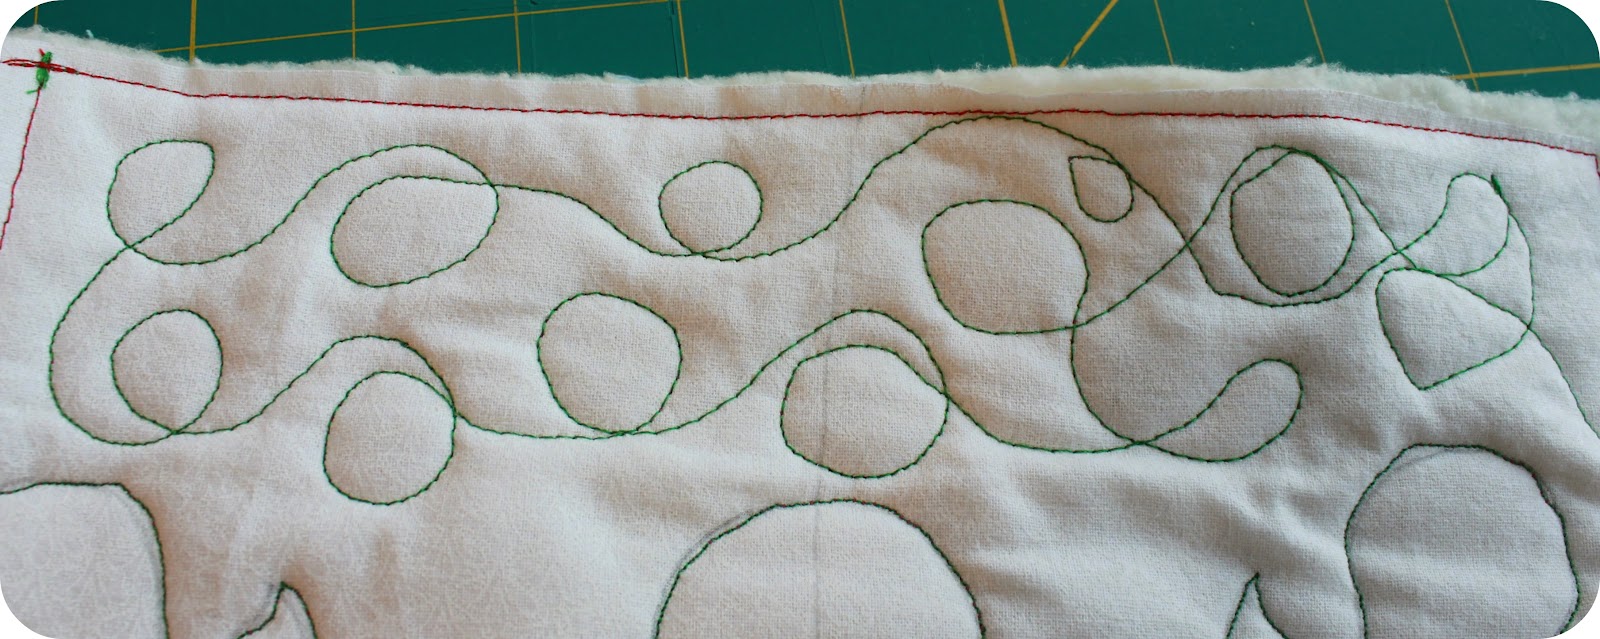
Quilting: Angela Walter's "paisley" free motion quilting with the Janome Horizon 8900 QCP

I'd love to hear any lessons ya'll have learned from making custom quilts either for free or for revenue ;-)

I did have to make a test quilt for this guy, so I look forward to sharing those photos this week!

Happy Crafting!

Claire

Tuesday, April 23, 2013

Finished: Pearl Bracelets Marine Den Quilt


Taadaa! This lovely quilt is my fourth Marine Den, and it was so much fun to work with colors that I would have never thought to use. Yay, yay, yay, for other folks who have the gift for picking fabric, because it's definitely always a challenge for me even when I'm just picking for myself.


I did a large meandering stipple for the background. I did still end up stitching in the ditch all around the pods, since I chickened out on FMQing the pod solids. Rather, I did do some FMQ in the pod middles. For some reason that actually seemed to be a faster approach than stitching in the ditch around the pod middles.


I think that's because stitching in the ditch is so tedious and precise; plus you have to turn the quilt each time you complete another side of a rectangle. Hours of fun.


Call me crazy, but I feel like the meandering stipple pattern gives a lot of elasticity to the finished quilt. If I pull on it in any direction, it has a bit of give to it. Then it snaps back, that's completely unlike the January do. Good Stitches quilt that has all different kinds of quilting patterns covering it. Has anyone else noticed this?


I had a bunch of spools of blue Coats & Clark thread from making curtains in 2007. Magically, the color was a perfect match for the background and backing fabric, so I used up two spools in this quilt. I used it to stitch in the ditch as well. I was able to use it in the bobbin on some of the FMQ in the pod middles, but I found that other stitches were more inclined to pull the bobbin thread up to the top. I was in no mood to experiment with threads and tension, so I used coordinating top and bobbin threads on some of the pod middles. It in no way bothers me to have spots of yellow thread on the quilt back. My inner child thinks it's fun, like a game of I-Spy, so my grown-up sewist side likes it, too.


Quilty Stats:
Pre-wash dimensions: I definitely wrote these down on one of the pieces of paper piled up around here.
Post-wash dimensions: 56"x37"
Batting: Warm & White from The Warm Company
Front Fabric: Michael Miller Cotton Couture solid in Wedgewood, Kona Cotton Blue, Ash, Ivory, and Celery, a gray "wood floors" print, Pearl Bracelets in Citron, River Bend, and Sandbox.
Back Fabric: Pearl Bracelets in River Bend
Binding Fabric: Kona Cotton in Celery
Quilting: Free Motion and Stitching in the Ditch with the Janome Horizon 8900 QCP.

Happy Crafting!

Claire

Monday, March 25, 2013

Finished: Marine Den in Blues and White

March has been a quilt-heavy month around The Clubhouse, which is why it's been a little quiet around here. I'm letting the sewing machine cool down a for a minute, though, so I can share with you a finished quilt from earlier this month!


This is the first Marine Den quilt that I've completed since last spring. It's one of three versions resulting from the (never ending) pattern writing process. This is also the FIRST quilt that I've ever free motion quilted. Sure, there have been some practice swatches over the last year, but I credit taking an FMQ class with Angela Walters at Fall Quilt Festival and my Janome Horizon 8900 QCP for giving me the confidence to take the leap.


I can't remember what Angela called this design, but I was immediately more comfortable with it than any of the others I ever tried, so there ya go. I also did some stitching in the ditch between the pods and around the pod centers. You can see how someone with great FMQ talent could go to town on the solid pod sides, but I wan't confident enough to try that at the beginning of March, though. Maybe next weeks ;-)


The back is this amazing sateen print from Heather Bailey's Garden District Line for Free Spirit. It's the  SAHB001Aquamarine print. This is definitely a heavier weight fabric, kind of like a lightweight home dec material. I think it made a great, tough quilt back, though. I used it for the binding as well. The colors in the undulating florals and paisley motifs inspired the colors for the front of the quilt.


Quilty Stats:
Pre-wash dimensions: I can't find where I wrote down my measurements. About 58" x 39"
Post-wash dimensions: I can't find where I wrote down my measurements. About 56.25" x 37"
Batting: Warm & White from The Warm Company
Front Fabric: Assorted Kona and Cotton Couture Solids, random prints, and the RJR Cotton Supreme Solid in French Vanilla (RJR9617-111)
Back and Binding Fabric: The SAHB001Aquamarine print from Heather Bailey's Garden District Line for Free Spirit.
Quilting: Free Motion and Stitching in the Ditch with the Janome Horizon 8900 QCP.

I've got another completed Marine Den quilt hanging out on the top rail of the stairs, and I just finished that do. Good Stitches quilt tonight. Get ready to see it later this week once I get some photos :-)

Happy Crafting!

Claire

Friday, April 13, 2012

FMQ Friday: Templates

It's been a busy week, but I'm back on track today with a little free-motion quilting. SewCal Gal's instructor for March wanted to remove her tutorial when the month was over, so it's on to April's lesson for me. There are instructions with an interesting approach to making your own template, but I opted to practice with a design I traced from a combination of Irena Bluhm's templates. 


This brings us to the things I learned today. . .

1) Make sure the pencil line you trace is dark enough to see.

2) It's easier to sew over your traced line if you are pushing the quilt away from you rather than pulling it towards you.

3) Stitching over a traced line is hard.


4) Echoing is hard, too.

5) Stitching a little free-for-all in the empty space is a lot easier and faster.


These monthly lessons are great for getting some exposure to different FMQ methods. I'm definitely going to keep working on it.

I used Isacord 40 weight in the top and a Dual Duty XP poly thread in the bobbin. The tension was set as low as it could go on the Bernina, and I was pretty happy with that. I like to use contrasting thread colors while practicing, but using the same color would hide any of the minor tension issues I'm seeing.


If you're in need of motivation and inspiration like me, hop on over to SewCal Gal's blog and participate in the year-long challenge.


In other news, I used the fabrics from last week's sneak peak in a quilt top I finished today. 


I can't wait to reveal the finished product in a week along with everything I learned while working on it. I hope you have a weekend full of crafts!

Friday, March 30, 2012

FMQ Friday: Ugly Feathers for Everyone!

I decided to try some more free-motion quilting today. It's been six weeks since I first tried FMQ on my Bernina, and I haven't given it another go since then. It's no surprise that this was the outcome of today's practice technique.


Whoa. That is some ugly feather action and some really horrifying echoing. It was actually painful to watch it happening while I was quilting. I tried to draw some feathers on paper after quilting this and noticed a lot of the same ugly feather shapes and terrible echoing.


Yikes. I have a long way to go.

I need to reduce any friction that may be preventing me from practicing my FMQ, so here's the plan:
1) Make a stack of practice sandwiches and keep them within arm's reach of my sewing machine.
2) Put a reminder on my calendar to practice.
3) Keep writing down the date, thread used, and tension settings on my samples.

For this pitiful plume, I used Isacord 40 weight in the top and a Dual Duty XP poly thread in the bobbin. My tension was set as low as it could go, and I was pretty happy with that. I like to use contrasting thread colors while practicing, but using the same color would hide any of the minor tension issues I'm having.


If you're in need of motivation and inspiration like me, hop on over to SewCal Gal's blog and participate in the year-long challenge.


I'm linking up with Remodelaholic and Finding Fabulous. I hope you have a weekend full of crafts!


Remodelaholic     http://www.findingfabulousblog.com/

Friday, February 17, 2012

First FMQ Ever Friday

There's a first time for everything, and this was my first go at free-motion quilting. Seriously. I had to go out and buy a foot.

Bernina #29 Freehand Quilting Foot: $41.99. I got it for 20% less thanks to a sale!

I made a little quilt sandwich, put the same Isacord thread in my top and bobbin threads, and started going to town. 


Annnnnnnd eyelashes. Ugh. 


The back looked fine, though. My upper thread tension was at the lowest point, so I poured through the Bernina 1630 (Update '96) manual looking for guidance. No help. No mention of increasing bobbin tension, which seemed like what I needed. I googled for troubleshooting tips and found one suggesting I try a different bobbin thread. My bobbin full of Isacord had me wandering in a forest of green eyelashes, so I happily pulled it out of my machine.


I threw in a random loaded bobbin with some Dual Duty XP 100% Poly thread on it. 


Jackpot. No eyelashes. 


The bottom still looked fine. I figured this was as good as I was going to get today, so I went to town. 


Whoa. It's not pretty, but I expected much worse. I felt like it was easier to get the needle going a little faster. I didn't like the jerky motion of the slower pace. You definitely have to think ahead about where you are going. I can see how practicing by drawing on paper could train your mind how to plan.


You can see what I mean about the little pink bobbin threads showing up on the front. I'm not normally one to quilt with different color top and bobbin threads. I was really just trying to get a good visual on my tension today. I like using the same color thread normally to camouflage these sorts of issues. 


Here's the back. No bobbin catastrophes except for a few places which can be blamed on user error.


I wanted to hold it up to the window to see if I was getting the "stars" that people talk about when you can see through your sandwich. Apparently they're caused by your tension being too high or using weird (presumably giant) needles or skinny thread. I was pretty much star-free except for some areas at the points on the leaves and places where I'd rushed the fabric and caused big stitches. 

I was inspired to give FMQ a go thanks to SewCalGal's 2012 FMQ Challenge. She says she improved her FMQ by regularly practicing over the course of a year, and I'd sure like to do the same. 


Go check out her post about it if you haven't seen it. There will be a year of free monthly tutorials and some prizes too!

I'd love to get your thoughts on my troubleshooting today and hear about your own FMQ experiences.

I hope everyone has a great weekend of crafts ahead of them!